설치한 xdebug의 버전은 3.3.1 입니다.
아래 사이트로 들어가서
Xdebug: Downloads
Downloads Please refer to the installation instructions on how to install Xdebug. Source Xdebug is hosted in GIT. The source code can be browsed through github and can be checked out with: git clone https://github.com/xdebug/xdebug.git Latest Release Xdebu
xdebug.org
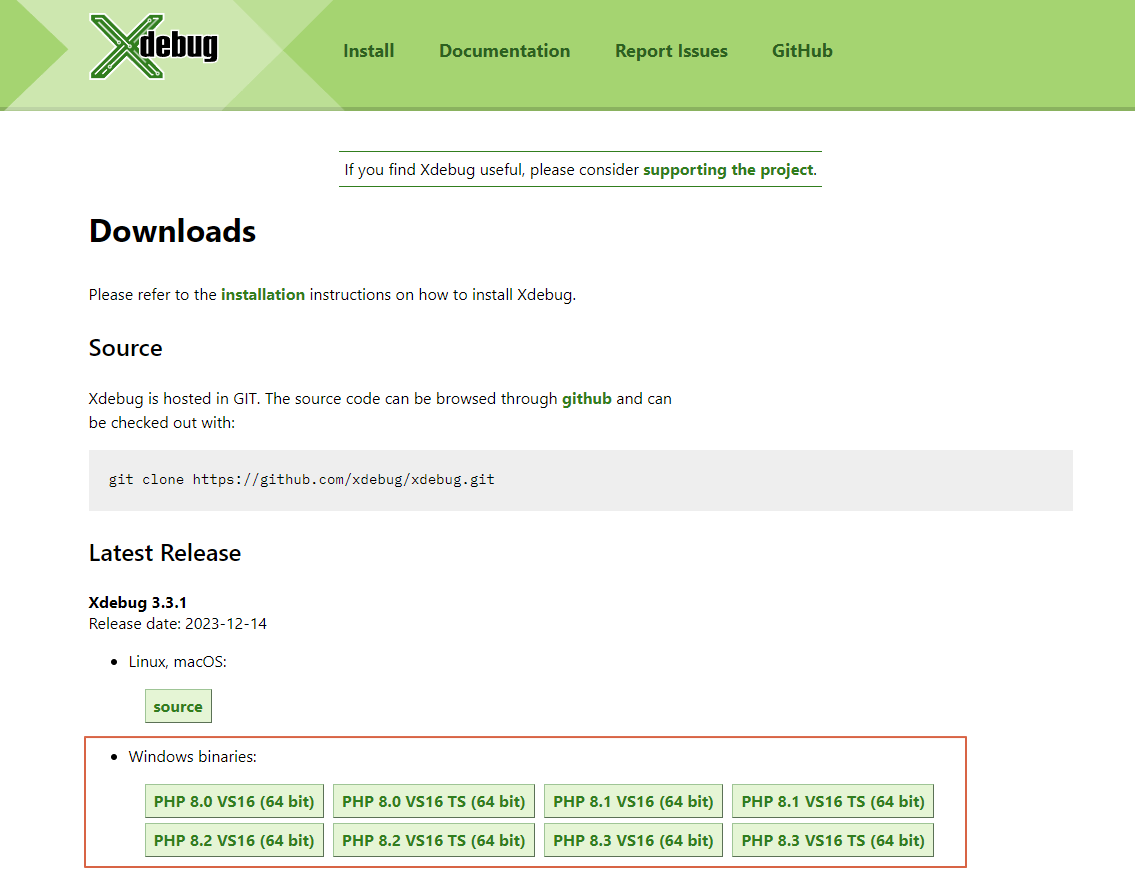
windows binaries에 본인이 설치한 php버전에 맞는걸 다운로드 해줍니다.
저는 php버전이 8.2.11 이라서
php_xdebug-3.3.1-8.2-vs16-x86_64.dll 파일을 다운로드 해주었습니다.
php_xdebug-3.3.1-8.2-vs16-x86_64.dll 다운로드 받은 dll파일을 php폴더 ext로 복사해주세요
예) D:\server\php\php8.2.11\ext\php_xdebug-3.3.1-8.2-vs16-x86_64.dll
파일을 복사하시고 아파치를 재실행 주세요.
php파일을 아래와 같이 만든후에 실행해주세요
확장 xdebug이 잘설치되면 아래와 같이 잘 나옵니다^^

이제 비쥬얼스튜디오 코드와 연동해봅시다.
비쥬얼스튜디오 코드에서 확장 ctrl_shift+f를 눌러주시고
PHP Debug, PHP Intelephense, PHP IntelliSense를 설치해주세요


PHP IntelliSense 톱니바퀴를 눌러서 나오는 화면에서 settings.json파일을 눌러주세요.

아래이미지 빨간색 부분입니다.
아래와 같이 php.exe의 경로를 지정해줍시다.
"php.executablePath": "D:/server/php/php8.2.11/php.exe"
그다음 비쥬얼스튜디오에서 Ctrl+Shift+D를 누르셔서 톱니바퀴 모양을 눌르셔서
lunch.json파일을 열어서 port번호를 확인해주세요.

포트번호가 일치해야합니다

그리고 이제 마지막설정으로
php.ini
zend_extension="D:\server\php\php8.2.11\ext\php_xdebug-3.3.1-8.2-vs16-x86_64.dll" 에
dll파일의 경로를 입력해주시고
zend_extension 아래에
아래와 같이 입력해주세요
version 3.0 이상일때 입력방법 입니다.
xdebug.mode = debug
xdebug.start_with_request = yes
xdebug.client_port = 9003
zend_extension="D:\server\php\php8.2.11\ext\php_xdebug-3.3.1-8.2-vs16-x86_64.dll"

xdebug.mode = debug
xdebug.start_with_request = yes
xdebug.client_port = 9003
이제 모든 설정이 끝났습니다. 디버깅을 해봅시다.
아래는 디버깅이 정상적으로 성공했을때 화면입니다.

'IT > PHP' 카테고리의 다른 글
| php json 파일만들기 및 출력하기 (0) | 2024.02.02 |
|---|---|
| 윈도우 Apache php버전 변경시의 httpd.conf 설정방법 (0) | 2024.01.20 |
| window에서 아파치.php,mysql,phpmyadmin 설치하는방법 (1) | 2024.01.13 |